


Professional Acoustic Treatment for Home Studios: Mastering Home Studio Soundproofing Materials
- Leroy Bocchieri
- Apr 13
- 5 min read
When it comes to creating a home studio, the sound environment is everything. You might have the best microphone, the sleekest desk, and the most powerful computer, but if your room sounds like a cave or a tin can, your recordings will suffer. That’s where professional acoustic treatment steps in. It’s not just about blocking noise; it’s about shaping sound to make your space work for you. Today, I’m diving into the essentials of home studio soundproofing materials and how to transform your room into a sonic sanctuary.
Why Home Studio Soundproofing Materials Matter
Imagine trying to paint a masterpiece on a canvas that’s constantly moving. That’s what recording in an untreated room feels like. Sound waves bounce off walls, ceilings, and floors, creating echoes, reverberations, and unwanted noise. This muddles your audio and makes mixing a nightmare.
Soundproofing materials help control these reflections and absorb excess noise. But not all materials are created equal. Some are better at blocking sound from outside, while others absorb sound inside the room. Knowing the difference is key.
Here’s a quick breakdown:
Absorptive materials: These soak up sound waves, reducing echo and reverb. Think foam panels, fiberglass, and mineral wool.
Blocking materials: These prevent sound from entering or leaving a room. Examples include mass-loaded vinyl, dense drywall, and acoustic doors.
Diffusers: Instead of absorbing sound, diffusers scatter it evenly, preventing harsh reflections and dead spots.
Using the right combination of these materials tailored to your space can make a huge difference. For example, placing absorptive panels at reflection points and diffusers on the rear wall can create a balanced sound field.
Choosing the Right Home Studio Soundproofing Materials
Picking the right materials can feel overwhelming. You want something effective but also affordable and easy to install. Here’s what I recommend focusing on:
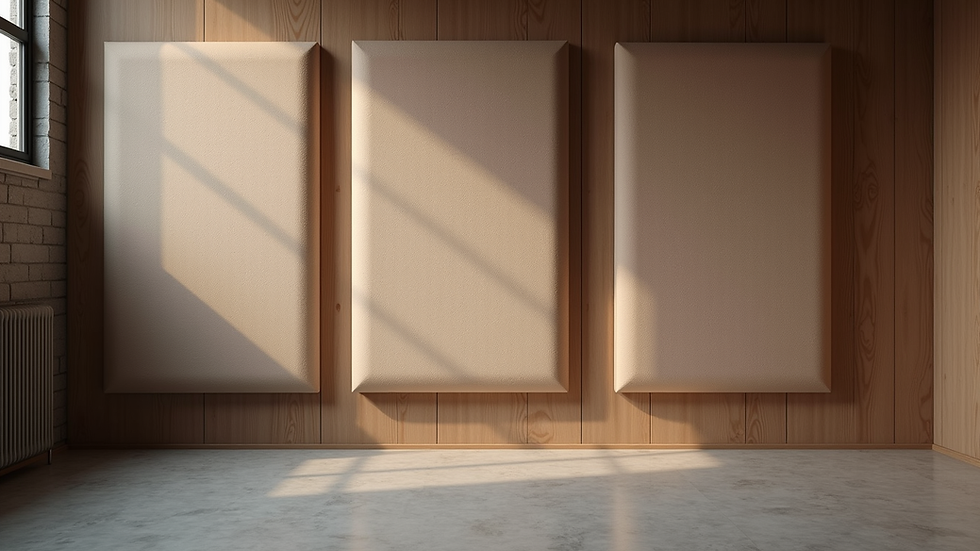
Acoustic Foam Panels
These are the classic choice. They’re lightweight, easy to mount, and come in various shapes like wedges or pyramids. Foam panels are great for absorbing mid to high frequencies, which helps reduce echo.
Bass Traps
Low frequencies are the trickiest to control. Bass traps, usually placed in corners, absorb these stubborn bass waves that can make your recordings sound boomy or muddy.
Mass-Loaded Vinyl (MLV)
If outside noise is a problem, MLV is a dense, flexible material that blocks sound transmission. It’s often installed inside walls or ceilings.
Diffusers
To keep your room sounding natural and lively, diffusers scatter sound waves. They’re perfect for preventing a “dead” sound that can happen if you overdo absorption.
Carpets and Curtains
Don’t underestimate soft furnishings. Thick carpets and heavy curtains can absorb sound and reduce reflections, especially on hard floors and windows.
Remember, the goal isn’t to make your room completely silent but to create a controlled environment where sound behaves predictably.
What is the 38% Rule Room Acoustics?
Here’s a neat trick that many pros swear by: the 38% rule. It’s a simple guideline for placing your listening position in the room to avoid problematic sound reflections and standing waves.
The rule says you should position yourself at about 38% of the room’s length from the front wall (the wall behind your speakers). Why? Because this spot tends to minimize bass buildup and reflections that can distort what you hear.
For example, if your room is 10 feet long, sit roughly 3.8 feet from the front wall. This isn’t a hard-and-fast law but a great starting point. From there, you can tweak your setup with acoustic treatment to fine-tune the sound.
This rule helps you avoid the “sweet spot” being in a place where bass frequencies either cancel out or amplify too much, which can trick your ears and lead to poor mixing decisions.
Practical Tips for Installing Acoustic Treatment in Your Home Studio
Now that you know what materials to use and where to sit, let’s talk installation. You don’t need to be a handyman to get this right, but a little planning goes a long way.
Identify Reflection Points
Use the mirror trick: have someone move a mirror along the walls while you sit in your listening position. Wherever you see your speakers in the mirror, that’s a reflection point. Place absorptive panels there.
Treat Corners with Bass Traps
Corners are where bass frequencies build up. Installing bass traps in all vertical corners can tame those low-end booms.
Don’t Overdo It
Too much absorption can make your room sound dead and unnatural. Balance absorption with diffusion to keep the space lively.
Mind the Ceiling and Floor
Reflections come from all directions. Consider ceiling clouds (panels hung from the ceiling) and thick rugs to control sound from above and below.
Seal Gaps and Doors
Sound leaks through cracks and gaps. Use weatherstripping on doors and seal any holes to improve sound isolation.
Use Adjustable Stands and Mounts
Acoustic panels and bass traps work best when placed at the right height and angle. Adjustable mounts let you experiment with placement.

How Professional Acoustic Treatment Transforms Your Studio
Investing in professional acoustic treatment is like tuning a musical instrument. It brings clarity, balance, and precision to your recordings and mixes. When your room sounds right, you can trust what you hear and make better creative decisions.
Here’s what you can expect:
Clearer Recordings
Your vocals and instruments will sound more natural without unwanted echoes or room noise.
Accurate Mixing
You’ll hear the true balance of frequencies, making it easier to create mixes that translate well on other systems.
Less Fatigue
Working in a well-treated room reduces ear strain and helps you focus longer.
Improved Creativity
When your environment supports your work, you’re free to experiment and push boundaries.
If you’re serious about your craft, professional acoustic treatment is a game-changer. It’s not just about soundproofing; it’s about creating a space that inspires and supports your best work.
For those ready to take the next step, exploring acoustic treatment for home studio options can open up a world of possibilities.
Making Your Space Work for You
At the end of the day, your home studio should be a place where sound feels right. Whether you’re recording podcasts, producing music, or designing soundscapes, the right acoustic treatment can make all the difference.
Start small if you need to. Even a few well-placed panels and bass traps can improve your sound dramatically. Then, build from there as your budget and needs grow.
Remember, acoustic treatment is both a science and an art. It’s about understanding how sound behaves and using materials creatively to shape it. With the right approach, your home studio can become a professional-grade environment that rivals any commercial space.
So, why wait? Dive into the world of home studio soundproofing materials and start crafting the perfect sound today. Your ears will thank you.
Ready to transform your space? Explore more about acoustic solutions and find the perfect fit for your studio.


Comments